
If you wish to import a file from Publisher, you will want to do some preparatory work in Publisher to get the best results.
Here are the basic steps, with details for each step below:
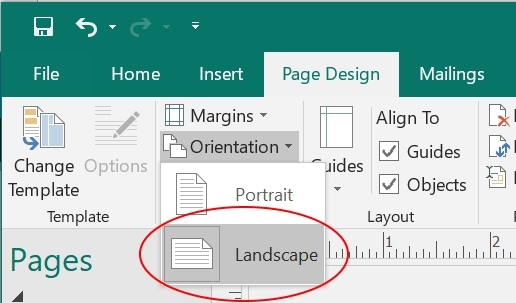
- Change your Publisher file to "Landscape" orientation in the Page Design tab.
- Set the correct Page Size ("7" x "5").
- Move your content on each page to fit the new orientation
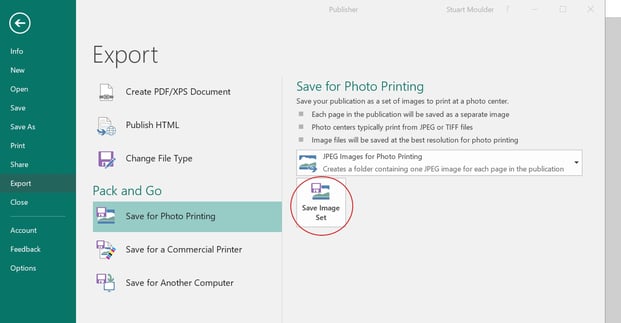
- Use File/Export/ Save for Photo Printing to export your pages as separate jpg files
- In Boom, use the Image tool on each card to import the jpg for that card
- Add interactive elements
- Publish!
1. CHANGE TO LANDSCAPE
Publisher formats its pages in "Portrait" orientation by default. Boom Cards are in "Landscape" orientation. You can fit your default Portrait pages into a Boom Card, but you won't be using all the space of the card. Therefore, we recommend changing the orientation of your Publisher file before exporting for use in Boom.
To do this, go to the "Page Design" tab in Publisher and select "Orientation" and then "Landscape".
2. CHANGE YOUR ASPECT RATIO
You should also change the Page Size to 7" x 5" to ensure that your pages will fit precisely into a Boom Card. Select the Size dialogue in the Page Design tab and then select "Create New Page Size" Set the Width to 7" and the Height to 5".

3. TIDY YOUR CONTENT
It is likely that your content no longer fits properly on the new pages, so you will want to drag that content into positions that look good in the new orientation.
4. EXPORT YOUR FILE
Once you have all your pages set the way you like, go to the "File" tab and select "Export". In the menu that "flies out" to the right, select "Save for Photo Printing".
By default it is set to "JPEG Images for Photo Printing", which is what you want. Click on "Save Image Set". Publisher is going to create a folder with each page exported as a separate jpg file in that folder. You should put that folder where it is easy to find when you are working on your Boom deck.
5. IMPORT YOUR FILES
Open up Boom. Each exported jpg file from Publisher can be brought in as the base image for a card. Drag the Image tool into the card and drop it. This brings up the "My Images" dialogue. Click on "Upload" in the upper right and then find the folder where you exported your pages.
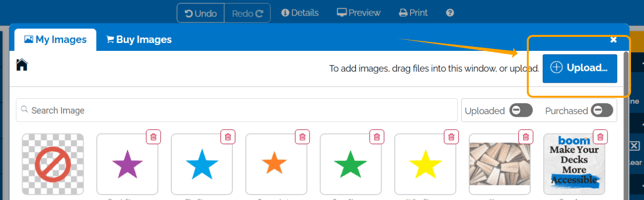
Select all the images in that folder. Click on the first image in the folder and then use Shift-Click to select the last image. Once you've selected all the images, click "Open".

This makes all your images available for this deck. Now click the image you want for this card. You can drag and resize that image to fit the card precisely.
6. MAKE IT INTERACTIVE
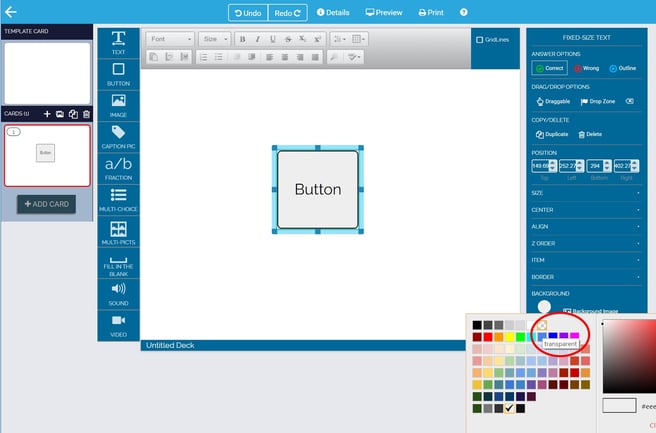
Now add your interactive elements. For example of you want students to click on parts of the image to submit their answer, drag buttons over each part of the image that has a potential answer. Then set the button color to "transparent" (the checked pattern). And be sure to designate the correct and wrong answers.
Once you've added all the interactive elements, click Preview to check it out. Once you're satisfied, Publish!
If you have any further questions, please feel free to email us at help@boomlearning.com or call us at (833) WOW-BOOM. A real human will happily help you!