You can create a Canvas assignment that uses Boom Cards from the “Assignments” page in Canvas, as well as the “Modules” page.
Before creating an assignment, here are some useful tips on Getting Started with Boom Cards in Canvas.
TABLE OF CONTENTS
- Creating a Boom Cards assignment from the Canvas “Assignments” Page
- Creating an assignment from the “Modules” page
- LTI Deep Linking Default for Assignment Creation
Creating a Boom Cards assignment from the Canvas “Assignments” Page
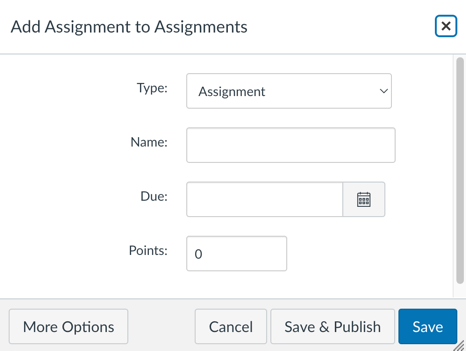
There are three options for creating assignments in the Assignments page. Identified below with options 1,2, and 3.

Options 1 and 2 (above) bring up different forms of the Canvas assignment creation screen. If you chose option 1, the full Canvas assignment editor will appear.
Choosing option 2 will open an abbreviated version of the assignment editor. In this case, you will need to select the “More Options” button to open the full assignment editor.
Create a Boom Cards Assignment Using the Canvas Assignment Editor
This applies to using the blue "+ Assignment" button, Option 1 in the image above, and "+" button in the Assignments bar, Option 2 in the image above.
In the full assignment editor, scroll down to “Submission Type” and select “External Tool”
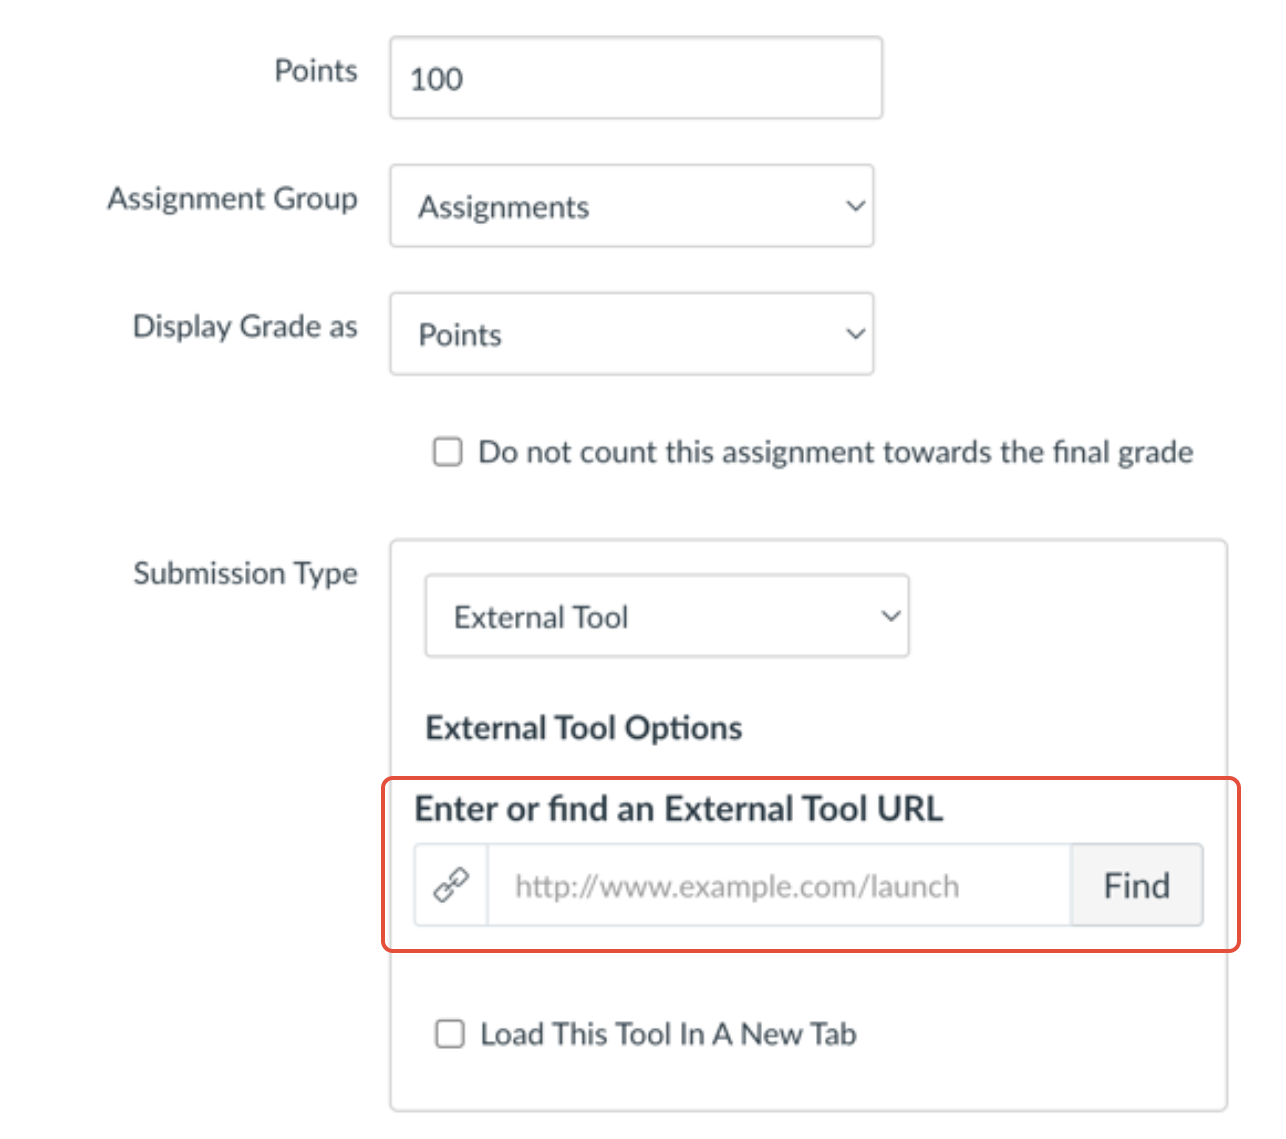
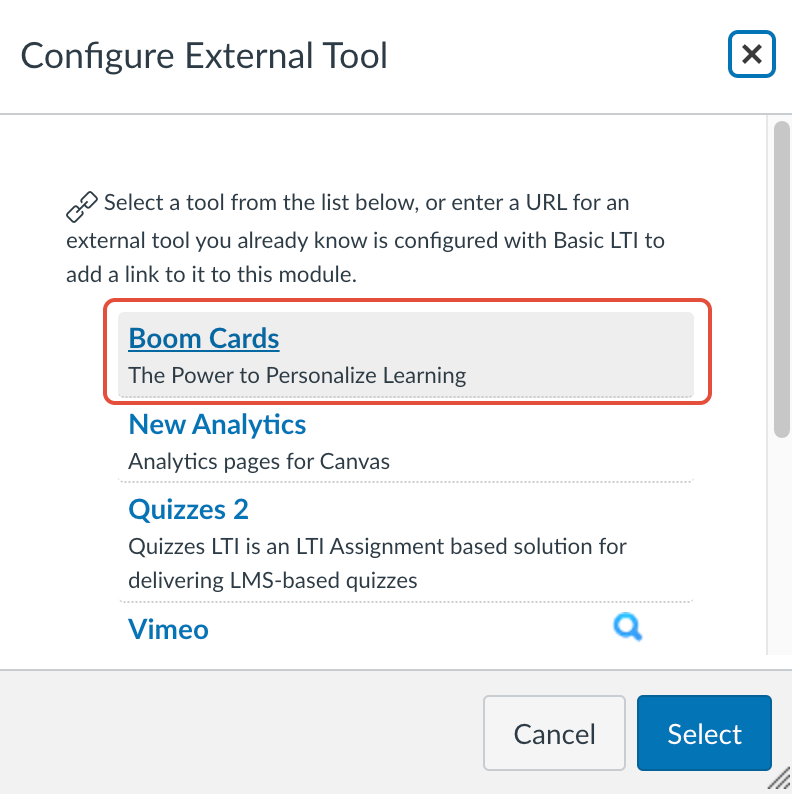
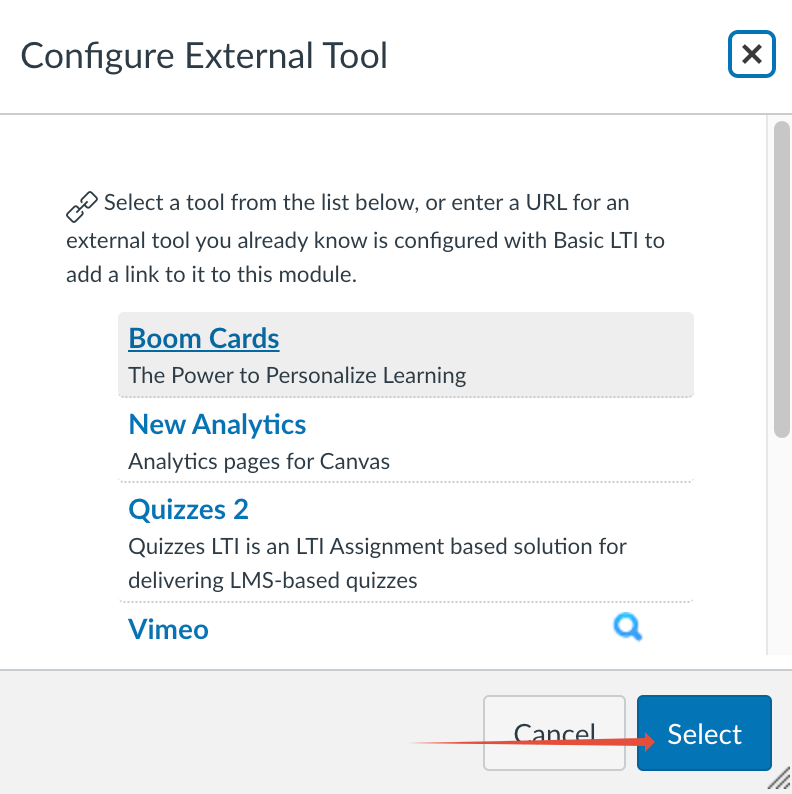
From inside the “External Tool” section, select the “Find” button, in the message box that appears, select “Boom Cards”.
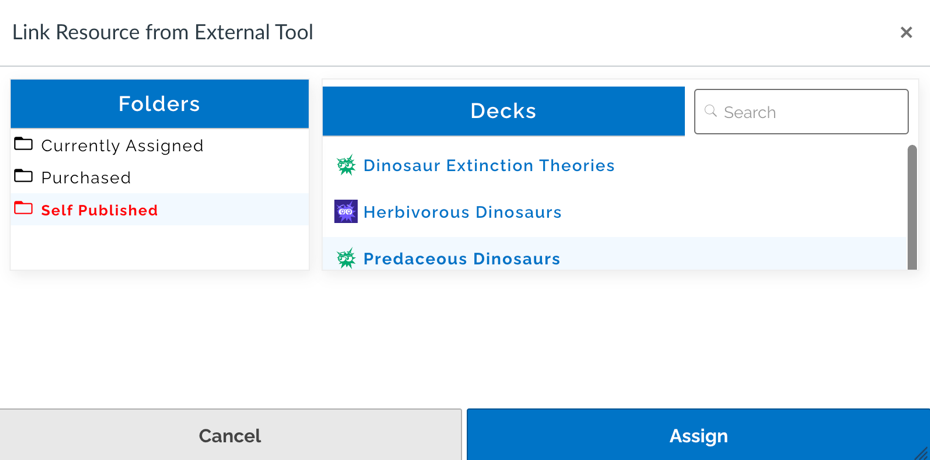
Once you have selected “Boom Cards”, Boom Cards will launch and present you with a view of your library. Click on the deck for the assignment and select ”Assign”
This will show the external tool dialog again. At this point, press the “Select” button at the bottom.
Continue configuring the assignment as you would any other assignment and then select “Save” or “Save & Publish”
Note: There is a setting inside of Canvas that changes this flow and will overwrite the assignment name and points value after selecting the Boom Cards assignment. This setting used to default to “Disabled”, but Instructure has recently changed this default to “Enabled”. We recommend you change this setting to “Disabled”. Further information on this is provided later in this article under “LTI Deep Linking default for assignment creation”
Create a Boom Cards Assignment Using the Menu

The third way to create a Boom Cards assignment from the Canvas Assignments Page is by selecting the overflow menu and then selecting “Boom Cards” from the drop down menu. Labeled above with the 3.
After selecting this, a message box will appear, allowing you to choose one or more decks. Once you have chosen the desired decks, select “Assign”. A separate Canvas assignment will be created for each deck you chose.
Creating an assignment from the “Modules” page
To create a Boom Cards assignment from the “Modules” page, go to the “Modules” page and click the '+' button on the module you would like to add the assignment to.
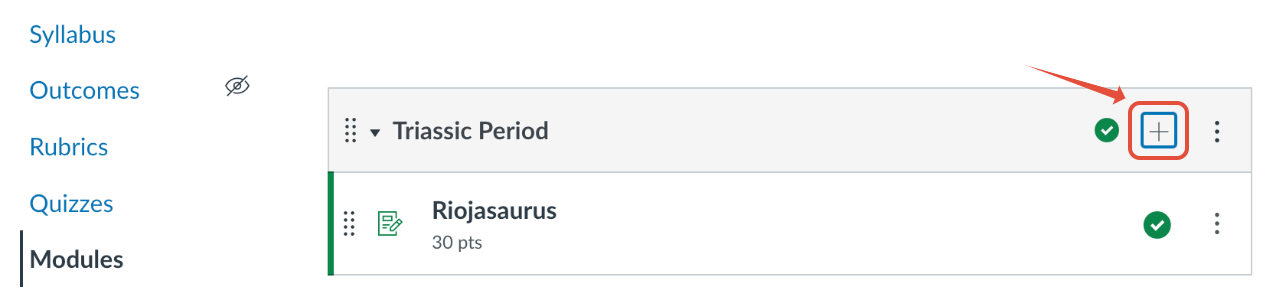
In the message box that appears, select “External Tool”
Selecting “External Tool” will expand the box to show the list of tools. Select “Boom Cards”.
This will bring up a Boom Cards message box to choose the decks you want to use.
After selecting this, a message box will appear, allowing you to choose one or more decks.
Once you have chosen the desired decks, select “Assign”. A separate Canvas assignment will be created for each deck you chose.
LTI Deep Linking Default for Assignment Creation
The LTI Deep Linking specification allows a tool, like Boom Cards, to create a Canvas assignment. There is an administrative setting inside of Canvas called “LTI Deep Linking Line Items on Assignment edit page.” If this is enabled, when a Boom Cards assignment is selected inside of the full assignment editor, Canvas immediately creates and saves the assignment. The result of this is that the assignment name and point value will be overwritten in the editor.
Consider the following:
- If the Deep Linking setting is disabled
- Continue assignment configuration as normal.
- Select “Cancel” to stop assignment creation.
- Select “Save” or “Save & Publish” to save the assignment
- Continue assignment configuration as normal.
- If the Deep Linking setting is enabled
- The current values on the assignment will be adjusted
- The name of the assignment will change to the name of the Boom Cards deck, overwriting what was originally typed
- The points value will be adjusted to the number of cards in the Boom Cards deck.
- The assignment will be created inside of Canvas
- Since the assignment will have already been created
- You will now be effective editing the assignment, instead of creating it.
- Selecting ‘Cancel’ will abort the changes in the editor made after the Boom Card deck was selected (and assignment automatically created).
- The current values on the assignment will be adjusted
To disable the automatic creation:
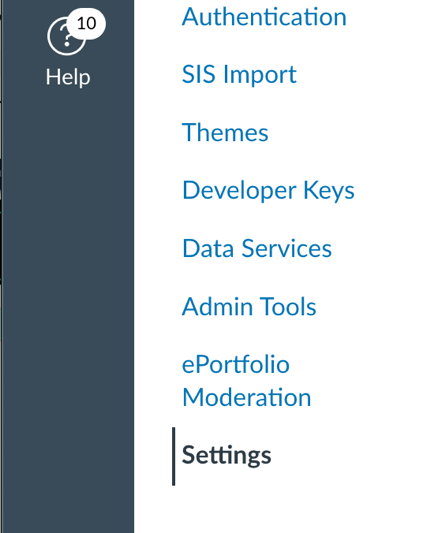
- As an admin, go to the account settings
- Go to the “Feature Options” tab

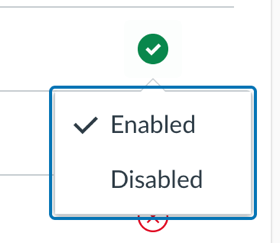
- Find the “LTI Deep Linking Line Items on Assignment edit page”

- There should be a circle with an ‘x’ in it. If this is filled in circle with a checkmark, select the checkmark and disable it
If you have any further questions, please feel free to email us at help@boomlearning.com or call us at (833) WOW-BOOM. A real human will happily help you!