
If you’re new to Boom, creating your classroom is the first (and most important) step. This is what lets you assign decks, track student progress, and collect data.
Don’t worry—you don’t need to set everything up perfectly right away. Most teachers start simple and build from there. This guide will walk you through it.
Why This Step Matters
Creating a classroom helps you:
- Track student progress automatically
- Save time on data collection
- Have data ready for IEP meetings
- Keep everything organized in one place
💡 No more scrambling for data—it’s already there when you need it.
Choose the Setup best for you!
There are a few ways to create a classroom:
- If you're new to boom and your School does not use supported
-
Create a New Classroom using Boom (Recommended for beginners)
-
Best if you want a simple setup and full control over student logins.
-
-
How to Import Classes from External Sites (Google, Microsoft, Clever, ClassLink)
-
Best if your school already uses these systems and you want everything synced.
-
💡Most new users start with a Boom classroom—it’s the fastest way to get up and running
Create a New Classroom using Boom
Step 1: Create Your First Classroom
- Go to your Classes tab
- Click “New Classroom”
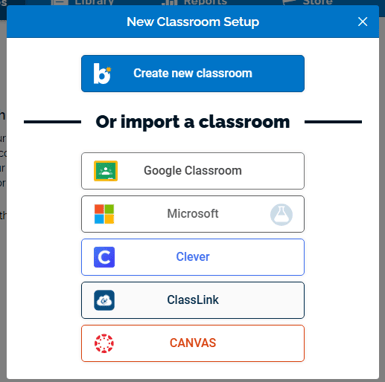
- Select the blue "create new Classroom" button
- Your classroom will be created automatically
✅ That’s it—you’ve created your first classroom!
Your classroom will have:
- A default "friendly" name (you can change it anytime)
- A unique username and password
To rename your classroom:
- Click the title at the top and type a new name
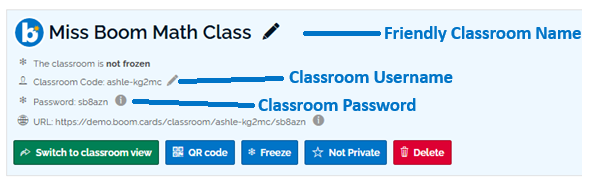
💡 Tip: Use something simple and familiar This is a name that your students will see (like “Room 12 Math” or “Miss Boom Math Class”).
Step 2: Set Up Login Details (Optional, but Helpful)
Each classroom has:
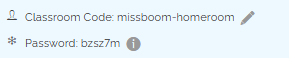
- A default username called a Classroom code
- A default password
You can edit them by clicking directly on them.
💡 Why these matter:
Simple logins make it easier for students to help them log in quickly with less frustration
Step 3: Understand Classroom Settings
New classrooms are set to:
- Frozen
- Private
Here’s what that means:
- Frozen: Freezing a classroom prevents students from creating new accounts or changing their nicknames.
- Private: Prevents students from seeing the names of other students in your roster.
For more information on classroom privacy, please take a look at this guide: How to Change Classroom Privacy Settings.
✅ This is usually exactly what you want for a structured, safe classroom environment.
💡 Tip: Keeping your class frozen is especially helpful for students who need consistency and support
Step 4: Add Your Students
You have two simple options:

Add one student at a time
- Click “New Student”
Add multiple students at once
- Click “Add Many Students”
- Paste or type your list
- Click “Add Students”
✅ Done! Your students are now part of your classroom.
These students in this class will be able to sign in using a username, and password created by you.
You can manage your student's logins from the classroom. You can have them login using a username and password, a QR code you print, or picture passwords.
💡 Why this matters:
Once students are added, Boom automatically tracks their work—saving you time on data collection later
How to Import Classes from External Sites
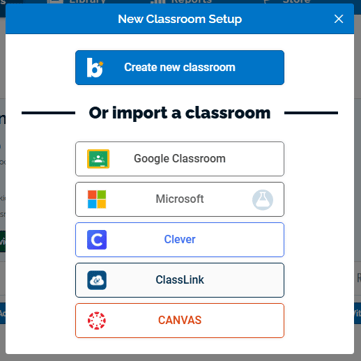
If your school already uses one of these, you can import your class:
-
Google Classroom read how to Setting Up Google Classroom with Boom Learning here.
-
Microsoft you can read how to Import a Microsoft classroom here.
Microsoft Import is leaving July 1st 2026.
- Clever you can read how to link a Clever Account here.
- ClassLink you can learn how to Integrate with ClassLink here.
Use the “Or Import a classroom” section and follow the prompts.
💡 This is helpful if your student roster already exists somewhere else.
✅ You’re Ready!
Once your classroom is set up, your next step is to: ➡️ Assign your first Boom deck
Start small—try one activity and explore the reports as your students use it.
Need Help?
If you get stuck, you’re not alone—learning new tools takes time.
You can reach out to:
- help@boomlearning.com
- (833) WOW-BOOM
A real person will help you get back on track.